
With the hightop fitted it was on to the interior, this as stated in the previous article is where I have learnt that next time I would insulate and carpet the roof out of the van before bonding as it certainly made life a bit more complicated working above your head. The reason for this was that I would be unsure where to stick any interior pieces of wood for the cupboard or light fittings.
I had not previously used self adhesive foam insulation but it looks by far the easiest way to insulate the roof, I had ordered a 10m roll and only needed 6m of it but I did not want to run short and not be able to carry on. I also ordered 7m of a lighter colour grey carpet for the roof to try and keep things lighter and add a contrast, I would have liked to use a different colour completely but was nervous it would make the join between the two colour to obvious.
The first job was to bond some wood to the fibreglass to allow me to fix my front cupboard and interior light. I placed two bits of ply in front and behind the vent as I was unsure where I would place the light and I could then run wire to both and in the future have another power cable ready for something else. I also ran a power cable to the front cupboard to fit a usb charger.


To start insulating I cleaned the entire inside of the roof with panel wipe to remove the dust left by the fibreglass process as this would have made it impossible to bond the self adhesive foam, this was heaven was so easy and fast to apply. I focused first on large flat areas and simple curves then cut smaller pieces to fill in the gaps and the more complex curves. This was then a good time to run the wires to where they needed to go and be able to hide then between duck tape which I used over all the joints in the insulation.


Next the carpeting and this is where it hit me how much easier this would have been out of the van upside down. Although I prefer to have joints in my carpet than to fit in in one piece and stretch it in, if I had been trying to do that I think I would have been tempted to cut the roof back off. So again I did the large flat areas with panels of carpet and left the edges unglued, then I could overlap the joins cut through both with a sharp knife and stick them down leaving a neat join. I also find using a scrap of carpet here to rub circles along the join ruffles the fibres up and blends the joins.


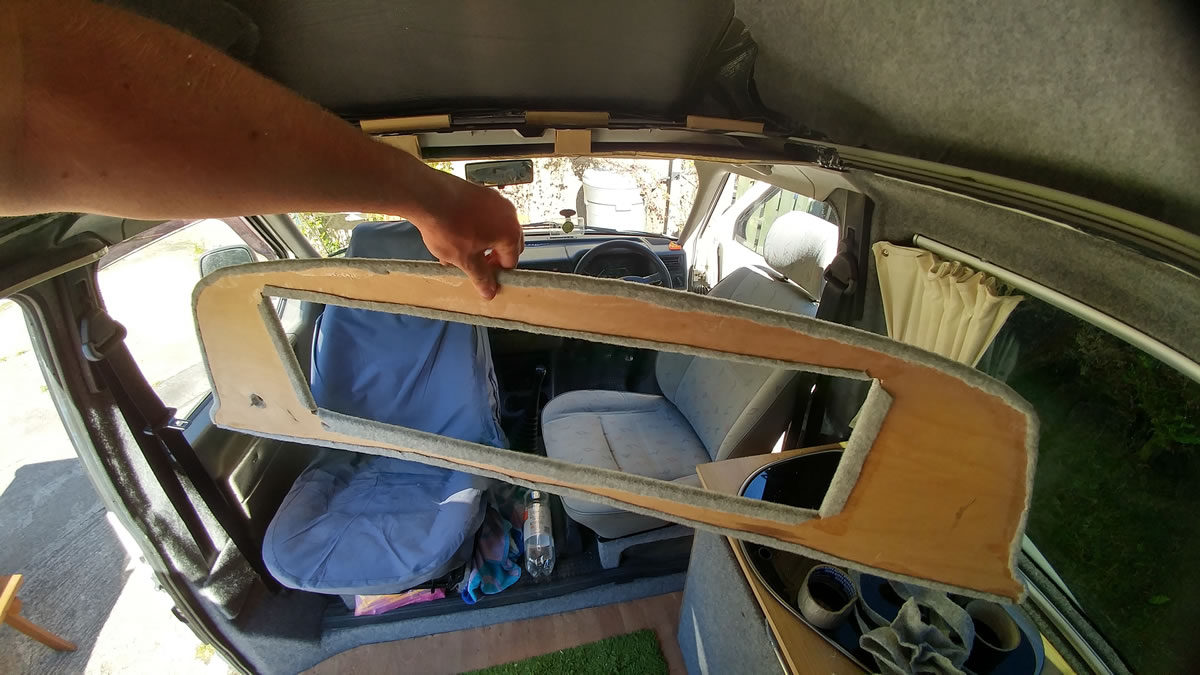
I then made a cardboard template for the cupboard front and transferred that to a bit of ply and carpeted the front. To screw the panel to the wood fixing points I cut a slit in the carpet with a sharp knife spread the carpet insert the screw and can then cover the screw back up.


I could then fit the door using a cupboard hinge stopper to hold the door open and a magnet to keep it shut. I sprayed the rear of the cupboard door with matt black and carpeted with the darker carpet colour from lower in the van to add some contrast. I also fitted a panel to tidy up between the cab and the cupboard. I used a piece of ply fitted to the top with spare 18mm ply for the sides. then a seperate 3mm ply for underneath against the cab roof.


I had an area at the edge of the van on both sides where the roof dipped away and would have been a nightmare if I had of just carpeted it as anything you dropped would have gone down and been hard to get at, so I cut up an old bodyboard to fill the void and allow the egdes to be flat to the outside.


The next big part was cutting up a sheet of 18mm ply to the width of the rain gutters where it would sit between, I then cut it into three 2ft sections and used some of the side cut off to create a strengthening bar for the front panel. This has given a width of 140cm and well over 6ft in length so gives plenty of room for two adults in the bed and allows so much storage space when travelling around. For more storage I can pull extra panels forward.


The last item on the agenda was to fit a roof light I had a criteria for wanting a dome light and either intergrated push light or switch on the side. This I had been struggling with as any boat or motor home suppliers seemed to only offer over priced tat. One I saw that had a dodgy switch on the side looked like it was from the pound shop and was priced at £19.99. So diy was going to be the only way I was happy, I had gone to B&Q with my parents to see what we could find where my mum found a cupboard dome light which was operated by pushing in the light diffuser, this was exactly what I have in mind but was 6v battery operated. Which meant I had to find a 12v bulb that would fit in which neatly replaced the existing 6v build I could then wire it directly to the vans 12v.

With that final touch I now had a hightop roof and it felt so good being able to stand and move around, I could hardly image what it was like when only a few days ago I was crouching over in the back. So I am going to get some use out of the new roof now and will write up something at a later date how I have been getting on with it.


Hmm, from what Ive gathered reflectix or similar needs to have a air barrier, and also the silver surface needs to be exposed (nothing blocking it) for heat to be reflected from it, otherwise its basically uselsee. Can youy confirm or deny?
I slept in the roof bed at Glencoe in well below 0 and only turned the propex heater on in the morning to take the chill off. Also the sound difference in not having it is unbearable although the carpet obviously helps.
Love the blog. Currently looking at Ben Nevis sat in my hammock off my t4. How has the roof box affected your mpg? I’m lurching over in the back of my t4 and I don’t know how much more my back can take!!
I would say probally lost 5mpg which I had gained when doing the 5th gear upgrade. I certainly can’t imagine bending over in a van ever again tho.
Hello,
I have a brief question on high top bed – did you strenghten somehow that plywood pannels? for example some steel L profile on sides. Or can 18 mm ply hold this weight alone?
Thank you!
I used a piece of 18mm ply to number 1 stop things from sliding down providing a lip and secondly to add strength where you would climb up. There is flex in the boards but once bedding was up there it didn’t really effect anything.
what did you do with the wiring that ran across the original roof. i have done the same: converted to a hightop but i still have the wring running from the front to to the back and i dont know what the are or how to deal with them.
Hi
I have a T4 hightop which I bought already fitted out. I noticed inside the cupboards above the cab the fibreglass part hasn’t been insulated and so everything in there is getting damp. The ‘floor’ of the cupboards has been carpeted so it’s just the fibreglass part I need to sort. I was searching the internet for some advice on what materials I would need when I came across your blog. It was really helpful, thankyou. I wonder though if you could advise me on the easiest way to do this, as in what materials I need? I like the self adhesive idea as it saves having to invest in a special mask. Would I need to carpet over everything after insulating in there? Thank you in advance.
Yes the self adhesive insulation would be the easiest method, just make sure you heat things up and clean them well so the glue holds. You can also purchase self adhesive carpet which you could use without the insulation or ontop of the insulation this will also save you from spray glue fumes.
I have a poptop which I’m about to convert to a high top (I’ve ordered it from Shapes after reading your blog)
May I ask which insulation and carpet you bought ? Perhaps an amazon link?
Thank you so much!